Grant Search Results
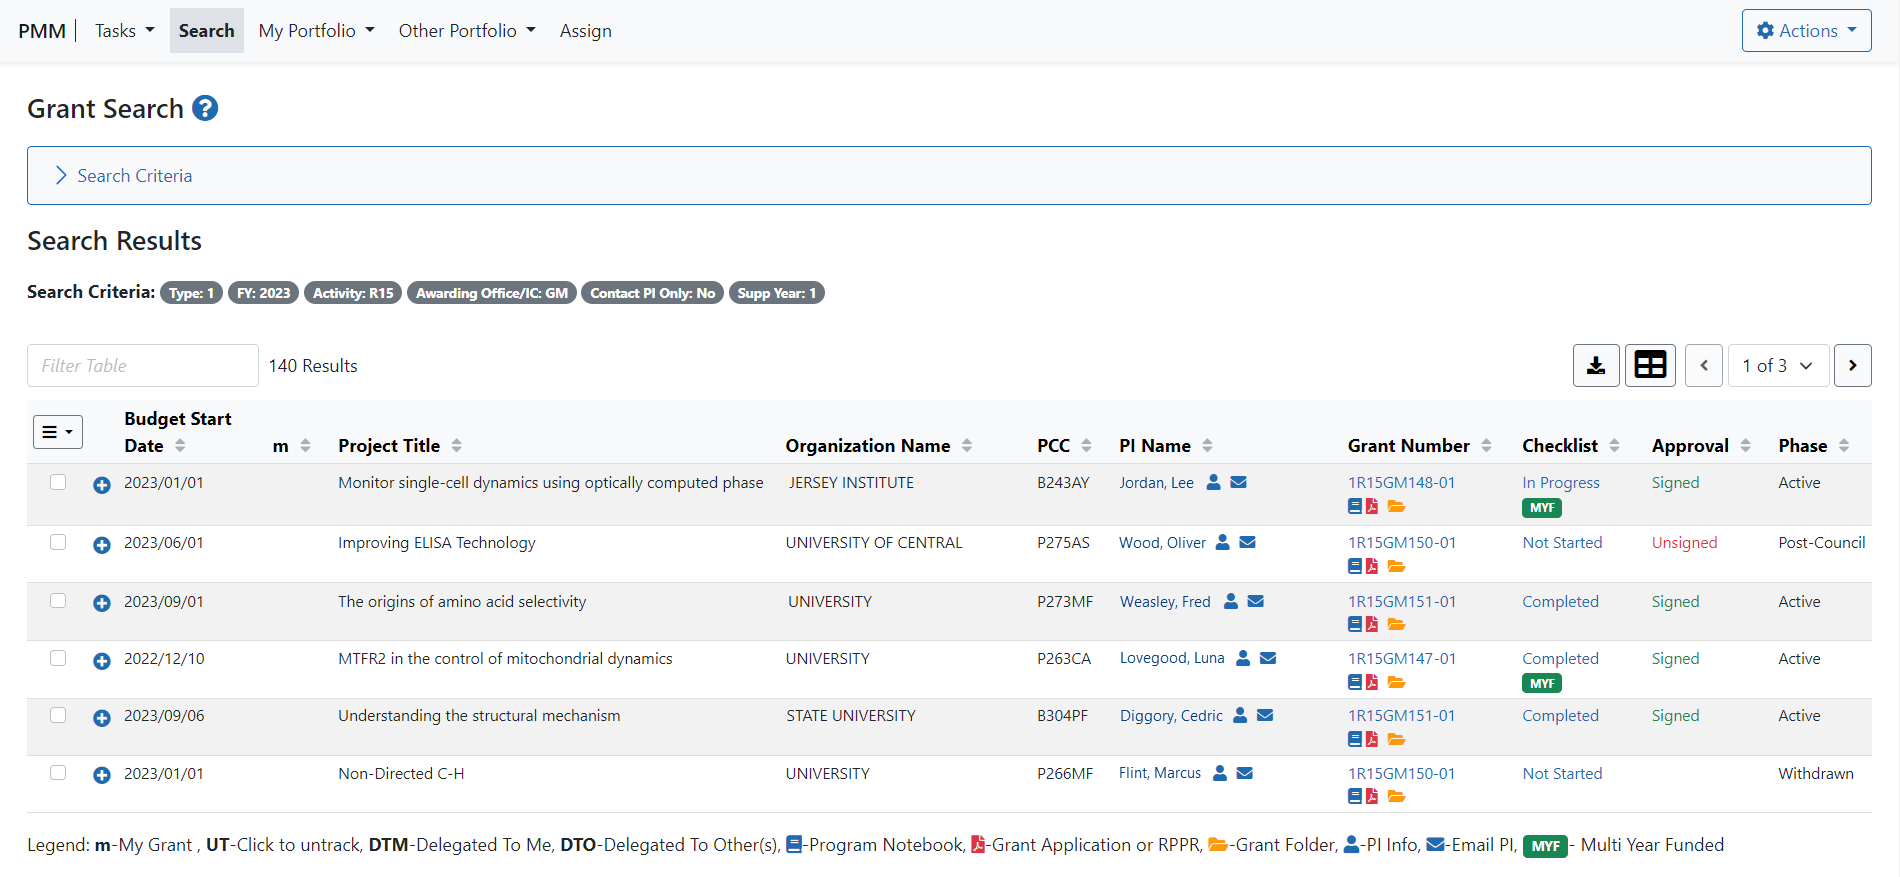
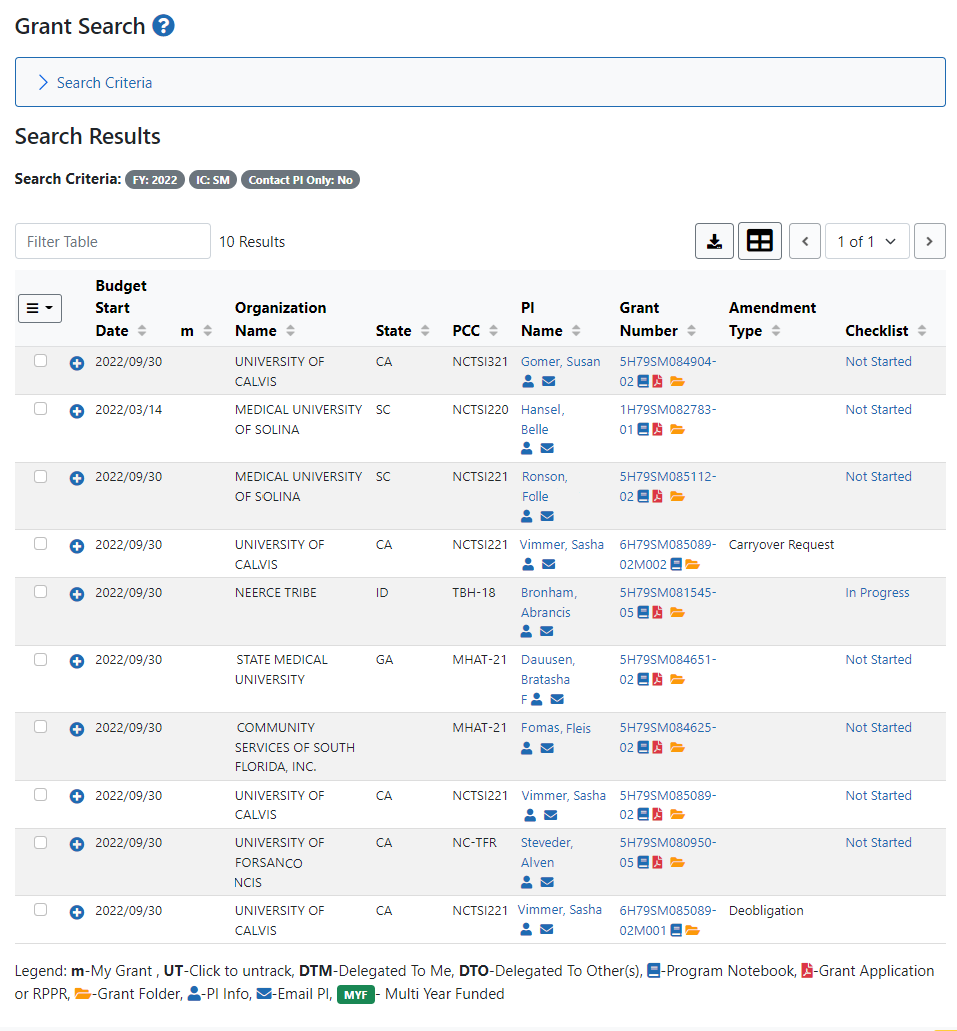
When you perform a Grant Search, the results appear in the search screen:
 For NIH Users:
 For SAMHSA Users:
Bulk Actions
Use the checkboxes on the left side of the grid to select grant records you want to take action on.
You can select records row by row, and/or click the select menu above the checkboxes to choose one of these bulk action options:
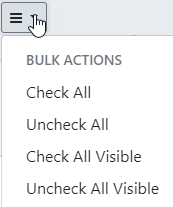
- Check All — Select all records on all pages of the search results, including any records that are hidden by the filter function.
- Check All Visible — Select only the records are visible on this page of the results: Records that are hidden by the filter function are not selected.
The counter above the grid will tell you how many you've selected:

IMPORTANT: Note that any selections you make are persisted as long as you remain in the search screen: You can move through the pages of results, selecting records on multiple pages, and all the records will stay selected until you navigate away from the search screen or perform one of these deselect actions:
- Uncheck All — Clear all selections on all pages of the search results, including any records that are hidden by the filter function.
- Uncheck All Visible — Deselect only the selections that are visible on this page of the results: Selected records that are hidden by the filter function are not deselected.
- Or click row-by-row to deselect individual records.
Actions
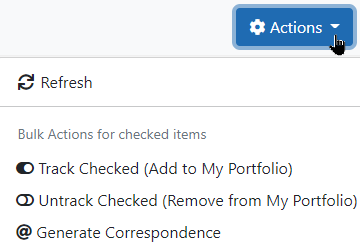
After you've made your selections, click Actions to open the Actions menu:
For SAMHSA:
For NIH:
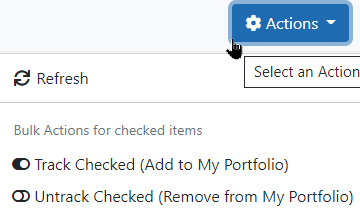
Then click to perform one of these bulk actions on the selected grant records:
These actions will apply to all the records you have selected, even if some of them are not currently visible in the screen because you are filtering the results. Remember to deselect records you don't want to act on.
- Track Checked — Begin tracking the selected grants in your portfolio and also track their Study Section Review meetings in Real Time Meeting Status (RTMS ).
- Untrack Checked — Stop tracking the selected grants.
- Manage Project Scientists — NIH only: NIH users can choose this action to manage the Project Scientist assignments of the selected application
s: The Manage Project Scientist screen will open so you can assign project scientists to the applications or update the existing assignments. - Generate Correspondence — SAMHSA only: SAMHSA users can choose this action to send correspondence to the selected grantees. See Generate Correspondence.
Track Grants
Tracking grants allows you to include in your portfolio grant records that are not assigned to you. Note: Tracked grants that are primary to other ICs will be read-only.)
Tracking accomplishes two things: You will see tracked grants listed when you view your own portfolio, and you can follow Study Section Review meetings for tracked grants in Real Time Meeting Status (RTMS) (see RTMS online help for more information).
Tracked grant records remain in your portfolio throughout their lifecycle, even if they are reassigned to another PO.
Use the Bulk Actions for checked items buttons in the Actions menu to track or untrack multiple selected grants.
To do so, use the checkboxes at the right side of the grid to select one or more grants, then open the Actions menu and click the desired bulk command:
- Track Checked (Add to My Portfolio) — Begin tracking the selected grants in your portfolio and also track their Study Section Review meetings in Real Time Meeting Status ( RTMS ).
Note: To access Real Time Meeting Status, click the RTMS link in the Grant Summary view. - Untrack Checked (Remove From My Portfolio) — Stop tracking the selected grants.
Working with the search results
Click the > icon  to open the expandable pane to see the Search Criteria.
The legend at bottom of screen explains the icons in the results grid.
Click a link or icon in the portfolio grid to perform the following actions:
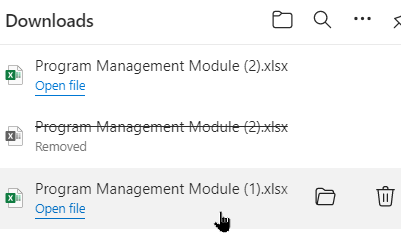
- Download — Click the download icon
 download icon to export the data in Excel format. A drop-down menu will open, giving you the choice of opening the file or saving it to a folder:
 - And you can use the checkboxes at the left of the grid along with bulk action commands in the Actions menu to select grants you want to start or stop tracking. See Actions above for instructions.
- In the Approval column, click on the approval status (Unsigned, Signed) to open the Approve/Disapprove Grant screen where you can sign or unsign the award.
- Filter: Enter text in the Filter box to quickly find any grant in a tracked portfolio. Enter partial or complete PI name or grant number and the system will only display the grants that match the filter text: all other records will be hidden.
You can enter multiple words, letter strings and/or number strings to narrow the search. Multiple search elements will be combined into an "AND" search statement.
Note: Filtering looks for matches throughout the portfolio, including the fields in the Summary View, even when the Summary Views are closed — See Summary View for more information.
Note: Filtering is most successful if you enter a distinctive word or string of letters or numbers. Filtering for short or common words will probably yield too many hits.
- Click the + icon
 in the first column of the grid to open a summary view of the grant. See Summary View for more information.
 - Click a column header to sort by that property, and click the arrow icon in the header to switch between ascending and descending sort.
- The
 My Grant icon identifies the grants that are assigned to you: this screen also displays other PO's grants that you are tracking.
 - The "UT" link indicates another PO’s grant that you have opted to track in your portfolio and also track its Study Section Review meetings in eRA's Real Time Meeting Status module (See RTMS online help for more information).
- Click the PI Name or the person icon
 to view the QVR Person Information report for the PI.
 - Click the mail icon
 to send email to the PI. The email is automatically addressed to the PI, with a cc to the assigned GMS and the institution Signing Official or Business Office address. The subject line of the email includes the full grant number.
 - When you find a grant record in any Portfolio or search results screen, you can click the grant number or the book icon
 to open the Program Notebook, where you can add notes and save documents related to the grant record. See Program Notebook.
 - Click the folder icon
 to open the grant's Grant Folder. See Grant Folder for more information.
 - For NCI grants only, click the
 eGrants icon next to the grant folder. Click to go to the NCI eGrants system.
 - And click the document icon next to the grant folder
 to open the grant application document (for competing applications) or the RPPR (for non-competing applications, if available).
 - In the Checklist column, click the Checklist link to open the grant record's Program Checklist. See Checklists for more information.
- In the Approval column, click the approval status (Unsigned, Signed) to open the Approve/Disapprove Grant screen where you can sign or unsign the award. See Approval/Sign-off for more information.
- The MYF badge icon
 in the Checklist column indicates a Multi-Year Funded award.
NOTE: Tracked grants that are primary to other ICs will be "read-only." Click the UT link to stop tracking a tracked grant.
Checklists
When you find a grant in the search results or portfolio screens, you can click the Checklist link to open the grant's Program Checklist and perform these functions:
- Complete Checklist — If you click the Checklist link on one of your own grants, the checklist opens so you can complete it.
- Sign Off on Grant — If you click the Checklist link on a grant that belongs to another PO in your IC, the checklist opens so you can sign off on it.
See Checklist online Help for instructions on completing and signing off on the checklist.
Program Notebook
When you find a grant in any Portfolio or search results screen, you can click the grant number or the book icon ![]() to open the Program Notebook.
to open the Program Notebook.
Use the Program Notebook to add notes and save documents related to the grant. These materials will remain with the grant through its lifecycle.
