Manage Lists/Categories Screen
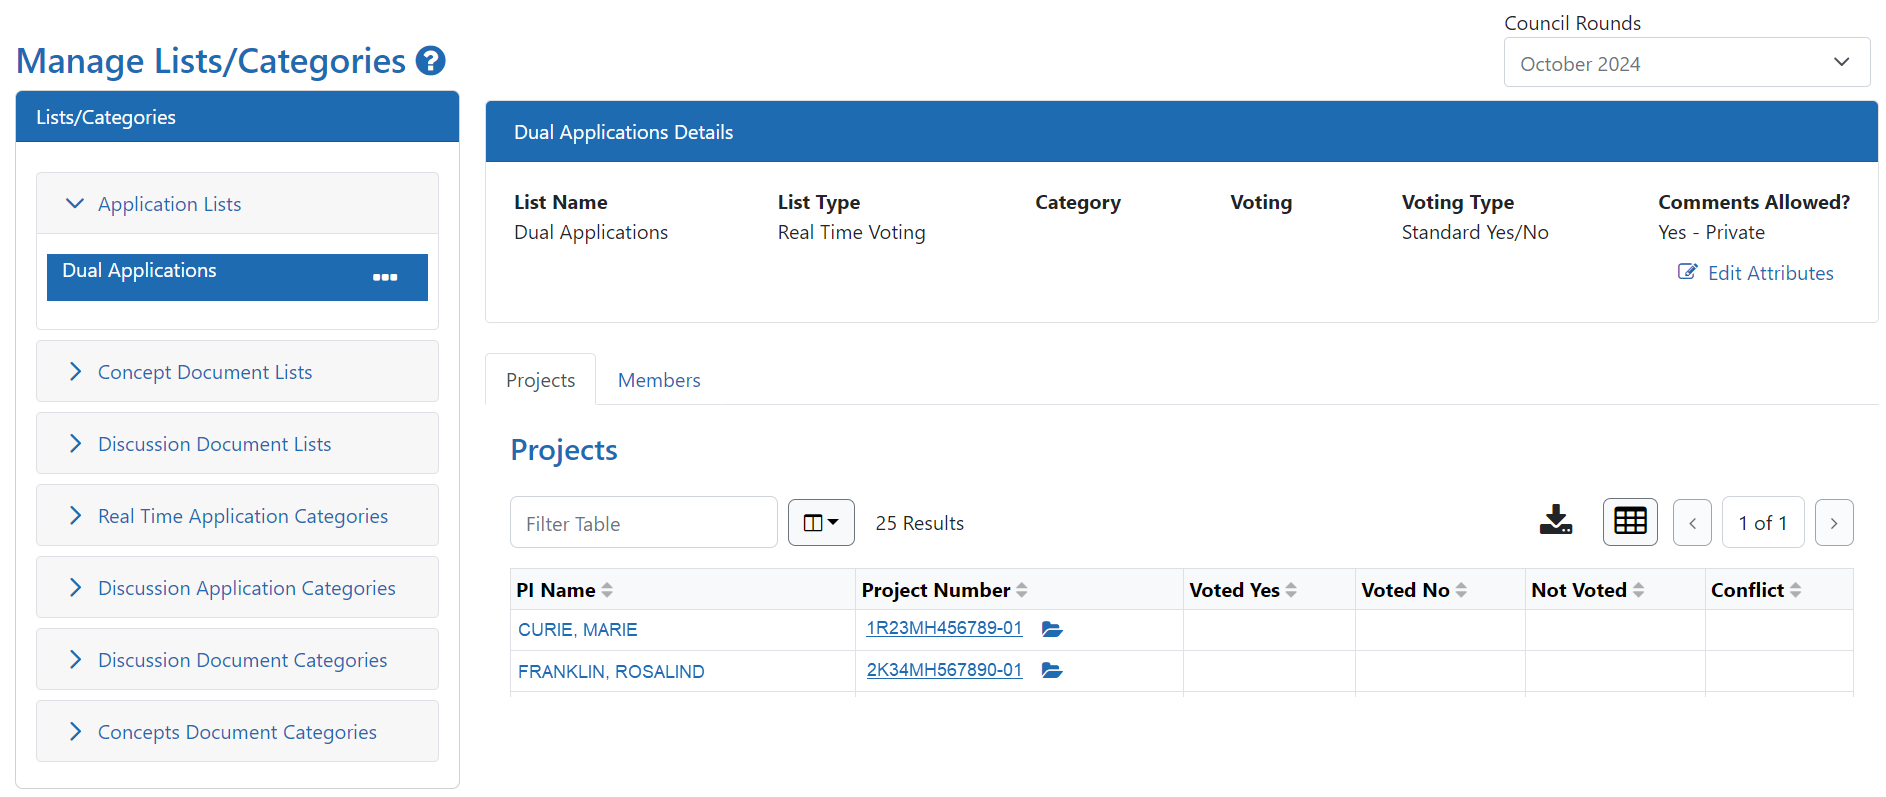
The Manage Lists/Categories screen is used to view and edit existing document and application categories and lists.
Creating application lists, document lists, and categories
Accessing the Manage Lists/Categories Screen
|
1.
|
On the ECB home screen, click the Lists/Categories drop-down and select Manage Lists/Categories. The Manage Lists/Categories screen is displayed. |

Selecting a council round
The Council Rounds drop-down at the top of the screen limits the page to the selected council round. Although it defaults to the current council round, you may select previous and next rounds.
NOTE: If you select a previous council round, the screen content will be read-only.
Council rounds roll over on the following dates:
|
January Council
|
November 1st
|
|
May Council
|
March 1st
|
|
August/October Council
|
July 1st
|
Viewing a list or category's details
The left side of the screen contains the Lists/Categories pane. Each list and category type is broken out into a separate pane.
|
1.
|
Click the  Expand button for a pane to view the items in that list or category type. Expand button for a pane to view the items in that list or category type. |
|
2.
|
Click the item name in the Lists/Categories pane to view its details on the right side of the screen. |
|
3.
|
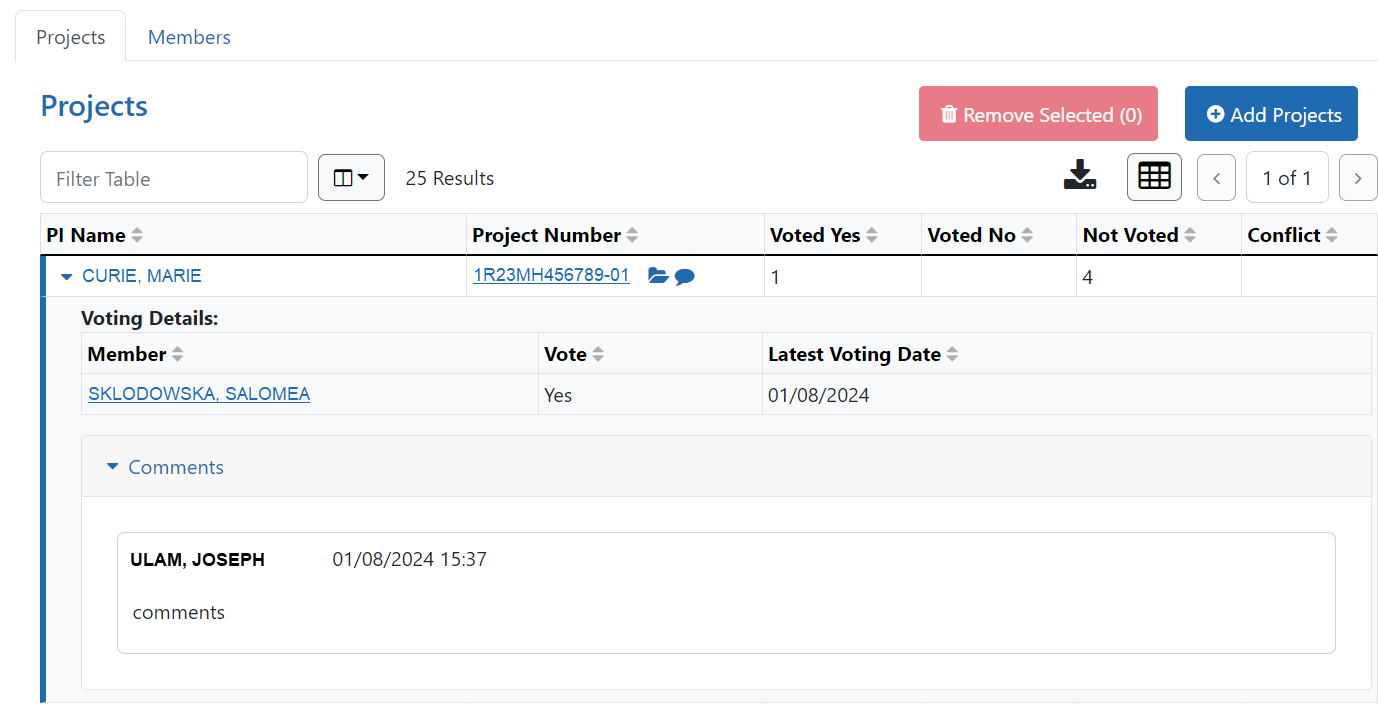
Click the  Expand button to view voting details, then click the Expand button to view voting details, then click the  Expand button for the Comments pane to view comments. Expand button for the Comments pane to view comments. |

Editing a list or category's attributes
|
2.
|
Click the Edit Attributes link in the upper-right corner of the screen. The attributes are displayed in edit mode. |
|
3.
|
Make changes as appropriate. |
|
4.
|
Click the Save button. The changes are saved. |
Adding members to a list or category
|
2.
|
Click the Members tab. |
|
3.
|
Click the Add Members button. The Add Members to screen is displayed. |
|
4.
|
Select the checkboxes for the members you wish to add to the list. |
|
5.
|
Click the Add Members button at the bottom of the list. The selected members are added to the list or category. |
Removing members from a list or category
|
2.
|
Click the Members tab. |
|
3.
|
Select the checkboxes for the members you wish to remove from the list. |
IMPORTANT: Note that the checkboxes and Remove button are disabled when the Voting status is set to Open and voting has started.
|
4.
|
Click the Remove Selected button. A confirmation screen is displayed. |
|
5.
|
Click the Yes button. The selected member(s) are removed from the list or category. |
Deleting a list or category
|
2.
|
In the Lists/Categories pane on the left side of the screen, click the  three-dot ellipsis button and select Delete List. A confirmation screen is displayed. three-dot ellipsis button and select Delete List. A confirmation screen is displayed. |
|
3.
|
Click the Yes button. The list or category is deleted. |

 Expand button for a pane to view the items in that list or category type.
 Expand button to view voting details, then click the
  Expand button for the Comments pane to view comments.
 three-dot ellipsis button and select Delete List. A confirmation screen is displayed.