Grant Awards tab
Search for Grant Awards
NOTE: Users with the GMM_ADMIN_ROLE, TERMS_CONDITIONS_ADMIN, or TERMS_TRACKING_ADMIN user role have access to this screen.
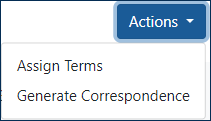
Click the Grant Awards tab. Use this screen to search for and select one or more grant awards, and then click the Actions button at the bottom of the screen to perform one of these bulk operations on the selected grant records:
- Assign Terms — Assign terms to the selected grants.
- Generate Correspondence— Send bulk correspondence to the selected grantees.

NOTE: If your search returns a large number of results, the Workflow Status and Assigned/Tracked Terms columns may not display.
Browse Mode
The search screen opens in browse mode showing all grant awards that are assigned to you as Grants Management Officer (GMO) or Grants Specialist (GS). Use the Assigned Active Awardsand All Active Awards buttons at the top right to toggle between showing all active awards for your IC or just awards assigned to you.
Active Search
For active searching, click Search Options to ![]() to open the Search Options display:
to open the Search Options display:

Saved Searches
Click the Save Search button to save your search criteria. A dialog box appears, in which you can set the following information:

-
Default Search — Select the Yes radio button to set Grant Awards to automatically open to the saved search and corresponding results.
-
Search Name — Enter an identifiable name for your saved search.
-
Search Description — Enter a description for your saved search (optional).
Clicking the Save Search button returns to the Search for Grant Awards screen. Click the Advanced Options header bar to display all saved searches. Click the Action menu icon next to a saved search to edit or delete the search.

Working with the Search Results:
Multi-Select
- Use the checkboxes on the left side of the grid to select grant records you want to take action on.
- You can select records row by row, and/or click the multi-select menu above the checkboxes to use one of these options:

- Check All — Select all records on all pages of the search results, including any records that are hidden by the filter function.
- Uncheck All — Clear all selections on all pages of the search results, including any records that are hidden by the filter function.
- Check All Visible — Select only the records are visible on this page of the results: Records that are hidden by the filter function are not selected.
- Uncheck All Visible — Deselect only the selections that are visible on this page of the results: Selected records that are hidden by the filter function are not deselected.
- Or click row-by-row to deselect individual records.
The counter above the hitlist table will tell you how many rows you've selected:

IMPORTANT: Note that any selections you make are persisted as long as you remain in the search screen: You can move through the pages of results, selecting records on multiple pages, and all the records will stay selected until you navigate away from the search screen or perform one of these deselect actions:
- Next: When you have selected the grant records you want, follow the instructions below to Assign Terms or Generate Correspondence or to export the records.
Assign Terms
You can select up to 3000 grant awards and assign terms to them in bulk:
Use the checkboxes as described above to select one or more grants, then select Assign Terms from the Actions drop-down menu at the bottom of the screen to begin assigning terms in the Step 1: Search for Terms screen.
Generate Correspondence
Follow these steps to select grant awards and send 2-way bulk correspondence to the selected grantees:
Note: You can only select grants that have been awarded, and you can select up to 3000 records at a time.
- Use the checkboxes as described above to select one or more grants.
- Then select Generate Correspondence from the Actions drop-down menu at the bottom of the screen to compose the message in the Selected Grant Details screen. For more information see Generate Correspondence.
Other Actions
- Click the Export button
 above the grid to print or export the selected grant records as an Excel or PDF file: A dialog box will open, giving you the choice to open or save the file.
 - Click the
 folder icon to open the grant folder
 - Click the
 mail icon next to the PD/PI name to send email to individual grantee. Note: When you send a message to the PD, the BO and SAMHSA Correspondence Email Address are automatically entered in the CC field. And a copy of the sent message is available in the Grant Folder Correspondence tab.
 - Or click the three-dot ellipsis icon below the award number
 to open the Action drop-down menu to perform one of the following actions on that grant record:

- Assign Terms — Assign terms to the selected grant.
- Manage Award — View and edit award details in the Grants Management Manage Grant screen.
- View Terms Tracking — View and manage term tracking for the grant in the View Terms Tracking Details screen.
- View Grant Portfolio — View this grant in the Grant Portfolio screen, where you can setup term tracking and manage the continuation schedule.
- View Correspondence History — View the history of
 all correspondence with the grantee. In this screen you can click View to view the correspondence, or click Cancel to cancel a pending send operation.
 - Generate Correspondence — Compose a message in the Selected Grant Details screen. See Generate Correspondence

