Create System Accounts
System accounts are used to access eRA Web Services.
Agency and Commons users can create system accounts.
To create a system account, first perform a search to make sure the account you want to create does not already exist. For instructions see
NOTE: The +Create New Account button described below is not available until you perform a search.
Review the search results to see if the account you want already exists, and if not, create a new account using one of the following options:
-
Click the + Create New Account button that appears below the search results:

Create New Account button dropdown
-
OR, click the ellipsis icon next to a user's name and select Create System Account Using Profile:

User action dropdown showing the Create System Account Using Profile option
The Create Account screen opens. Complete the required fields in the following sections:

Create System Account screen
User Information
The Primary Organization field displays the prepopulated primary IC of the account coordinator creating the account. This is a read-only field.
Certificate Information
Complete the certificate information by manually typing all certificate information into the required fields, or use the Import Certificate button to automatically import the required information into each field from the certificate file:

The Create System Account screen's Certificate Information section showing the Import Certificate upload button
Click the Import Certificate button to upload a certificate file:
-
Drag-and-drop a file to the upload field or click Browse to select the file from your computer.
-
Click the Get Certificate Details button to retrieve certificate details from the uploaded file.
-
Click the Copy to Account button to return to the Create Account screen with the information imported into the appropriate fields.

Import Certificate Information upload popup

Import Certificate Information popup showing certificate details and the Copy to Account button
If you are manually entering the certificate information, type the required information in the following fields:
-
Certificate Owner — enter the organization who acquired the certificate.
-
Certificate Provider/Authority CN — select the appropriate provider from the dropdown.
TIP: Examples of the values that are available for the Certificate Provider/Authority CN include Comodo, Digicert, Entrust, Geo Trust, Go Daddy, InCommon, and Thawte.
-
Certificate Serial Number — enter in XX:XX:XX:XX:XX:XX:XX:XX format
-
Certificate Expiration Date — enter or select from the calendar-picker field
For information on obtaining and registering a certificate from a certificate provider or authority, refer to one of the Web Services Certificate (S2S) Guide:
- Section 2.4.3 for Commons users - only users with the SO role have the privileges necessary to register the certificate in AMM; Commons users must work with their SO to register their certificate.
Contact Information
Complete the following fields:- Last Name
- First Name
- Middle Name (optional)
- Confirm Email
Roles
Click the Add Roles button to add the roles to the account. The Add Roles popup displays.
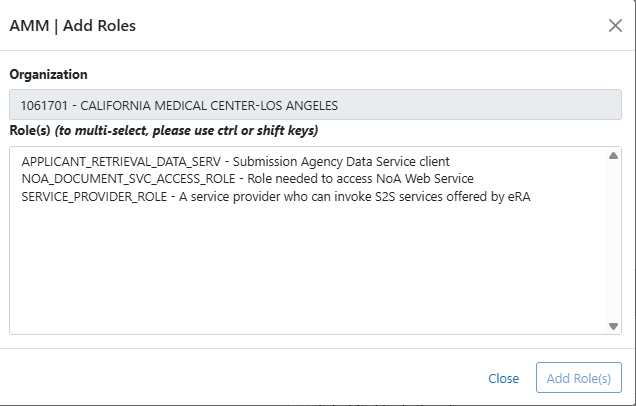
Add Roles popup
Note the role description on the screen when adding a role.
Click the Agreement checkbox below the Roles section.

The Agreement checkbox is mandatory for the user to acknowledge information provided for the system account. If the Agreement checkbox is not checked and the Save button is clicked, the system displays the following error message: User must accept the agreement by checking the field.
Click the Create button to create the account or click Clear to clear all fields.
When you click Create, the system validates the account information. If there are no errors, the Account Detailsscreen opens, displaying a success message.
Other Actions:
- Click the Validate Certificate button to validate the certificate. See Validate Certificate for more information.
- Click the Manage button if you want to make additional changes. See Manage System Accounts for more information.
- Click the Back to Search button to return to the Search Accounts screen.
